I just found out that I haven't made a post about the crochet lace bikini that I made. This is what I wore on our El Nido trip during the first day, but the photos taken on the trip didn't capture the true beauty of this *sad* So yeah, here's a more detailed photo of it:
I've always loved the criss-cross-laceup-style, so I thought I'd use that pattern for my bikini and I loved it! Anyhow, please pardon my flat ass. Too lazy to do squats. Never liked exercising anyway haha
Here's a flat lay of the bikini:
I'll definitely do more! If you're interested with my creations, you can send me a message. I can do made-to-orders for you :')
I've been crocheting almost everyday for the past few months; it's what I always do whenever my baby is sleeping or on good behavior. So I find the fact that I haven't written about it yet very weird! 「(゚<゚)゙
Fashion, makeup, cosplay and finally, crocheting; I bet you're wondering how it all began. Before I was introduced to it, I would always associate the art with blankets, rugs, doilies, cover ups and grannies buried underneath heaps of yarn by the fireplace - definitely not my cup of tea! Then one day, while searching for ideas for my baby's getup, I fell in love with the cutest mermaid crochet costume ever and the rest is history. I discovered that there were a lot of amazing stuff you can create with it... and how cute my baby looked in one! Definitely a win. Admittedly, it's difficult to learn something like crocheting without a mentor who could demonstrate things right in front of you, and it was a shame that I couldn't find anybody to teach me, but the determination to create wonderfully cute costumes for my baby took over! Youtube had a treasure trove of tutorials.
As expected, it was a tough road to take: a hook in one hand, and a baby in another! It was labor intensive and time consuming. Even though there were times that frustration got the better of me and I wanted to give up, I just reminded myself of how my baby would look like in my long list of dream creations and I would instantly snap right back on track. Today, I have a massive collection of cute crochet stuff for my baby - from hats to boots to dresses and swimsuits. Nothing beats the joy of seeing my daughter wearing a dress I specifically made for her. I'm proud to say that everything was made with lots of love, and that's what matters the most to me. It all paid off! <3
I've got a long way to go, but I'm happy that I took the opportunity to learn the art of crocheting. 6 months in and it's not just a hobby anymore, it's more of a, say, passion. Yes, just like how I feel about everything you see here in my blog. Crocheting is love (♥ω♥ ) ~♪ And I wish to spread the love for crochet too.
With that said, I'll be sharing my latest crochet project. It's the off shoulder swimwear that I wore during the 2nd day of our El Nido trip. I'm quite satisfied with how it turned out considering that its my 2nd attempt at swimwear. The first one was the watermelon bra that I wore during baby Anastasia's 5th month shoot here. Without further ado, let me show you my version of the off shoulder swimwear (灬♥ω♥灬)
If some of you are curious as to how effective it was as swimwear, then I would say... absolutely not! Hahaha! I should have considered the kind of yarn to use. I chose to use Gantsilyo Guru's Milk Cotton Light in Old Rose because it was too pretty, all the while ignoring the fact that it was made of cotton. So basically (which didn't seem so basic at the time), the yarn would naturally expand and get heavier when wet. ໒( •́ ∧ •̀ )७ As consequence, they had a tendency to slip down when beach time came. If you're planning on making one of your own, I suggest using a lightweight synthetic yarn instead. A nylon yarn, maybe? Don't make the same mistakes as I did!
Okay moving on.. I'll just look at the bright side, and I hope you will too! Learning crochet can be heartbreaking at times (unraveling every stitch you made after "finishing" because you just found out that you've been doing it wrong (⌯˃̶᷄ ﹏ ˂̶᷄⌯) - and believe me, I've been there a million times) but it can also be very rewarding. It's just how it goes, especially if you're planning on learning the art by yourself. Mistakes are there to make you learn and improve! (๑•̀ㅂ•́)و✧
Anyhow,
This is how it looks when worn with only the bikini.
'
and with the beach cover up skirt
OFF TOPIC: I think I did a pretty good job in getting my body after giving birth. Although, it's not the same as it was before because of all the mommy tattoos I got from it. Hehe~ And yes, I'm back to being tan. It's been years since I was last this dark.
And before I end this post, here's me wearing the swimsuit on the actual trip! Hohoho.
And that's it. I hope I somehow inspire you to crochet! 」( ̄▽ ̄」)
This project was made 2 months ago. But I'm only posting about it now because I'm too busy being a new mom. ( ◞・౪・)
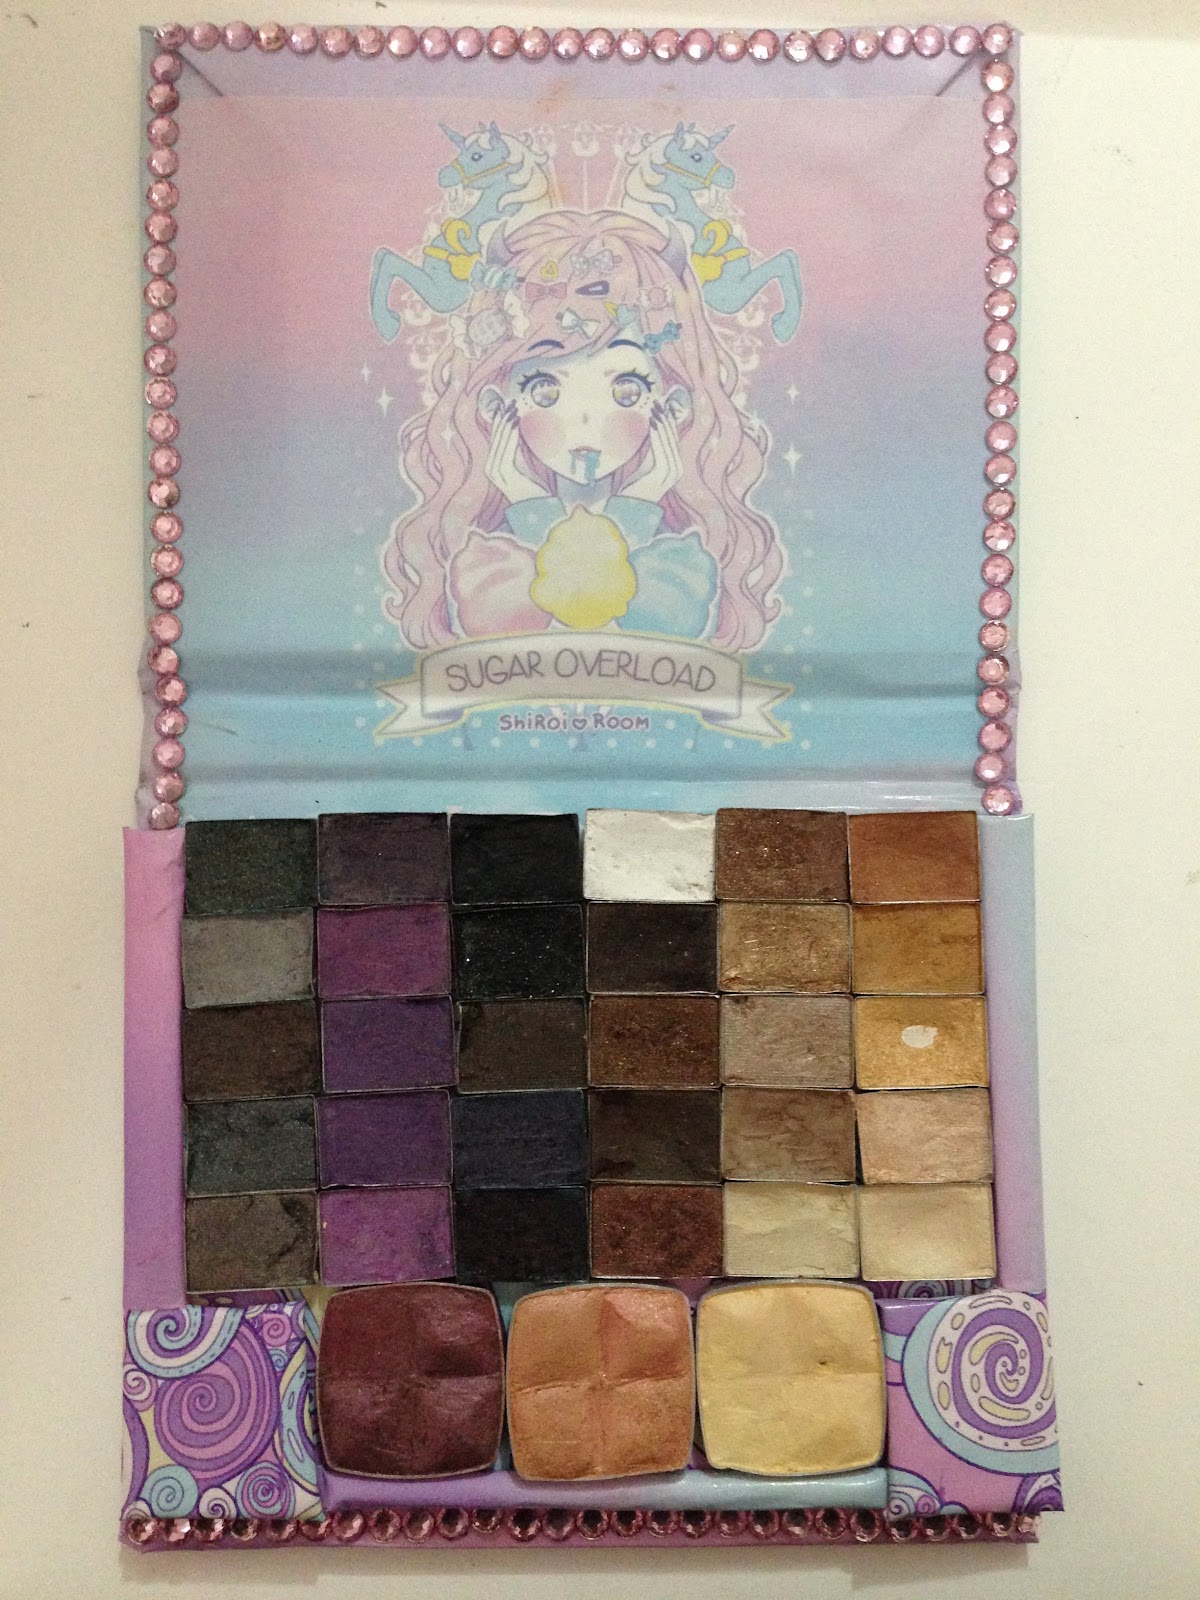
Being a makeup junkie and a DIY enthusiast made me want to create my own customized makeup palette. I've always been wanting to do this for so long. And now finally here it is! I'll show you my first attempt on creating this DIY makeup palette. This is an inexpensive alternative for the infamous, Z Palette. Why spend $20 on a Z palette when you can be creative and make your own for only $5! Plus, it's more fun customizing your own palette. Just like what I did. (´ ◕◞౪◟-)-☆
I'll share some snaps and thoughts on how I did mine. It wasn't originally in my plan to do a tutorial for this. This is just like a trial and error, and an experiment to me. I'm still discovering ways on improving them. So I kinda missed taking pictures on some part of the procedure. But I'm planning to do a better palette with a very detailed tutorial soon! But for now, please bear with my not so detailed tutorial. So without further ado, I now present you my first attempt on DIY CUTE GALAXY MAKEUP PALETTE!
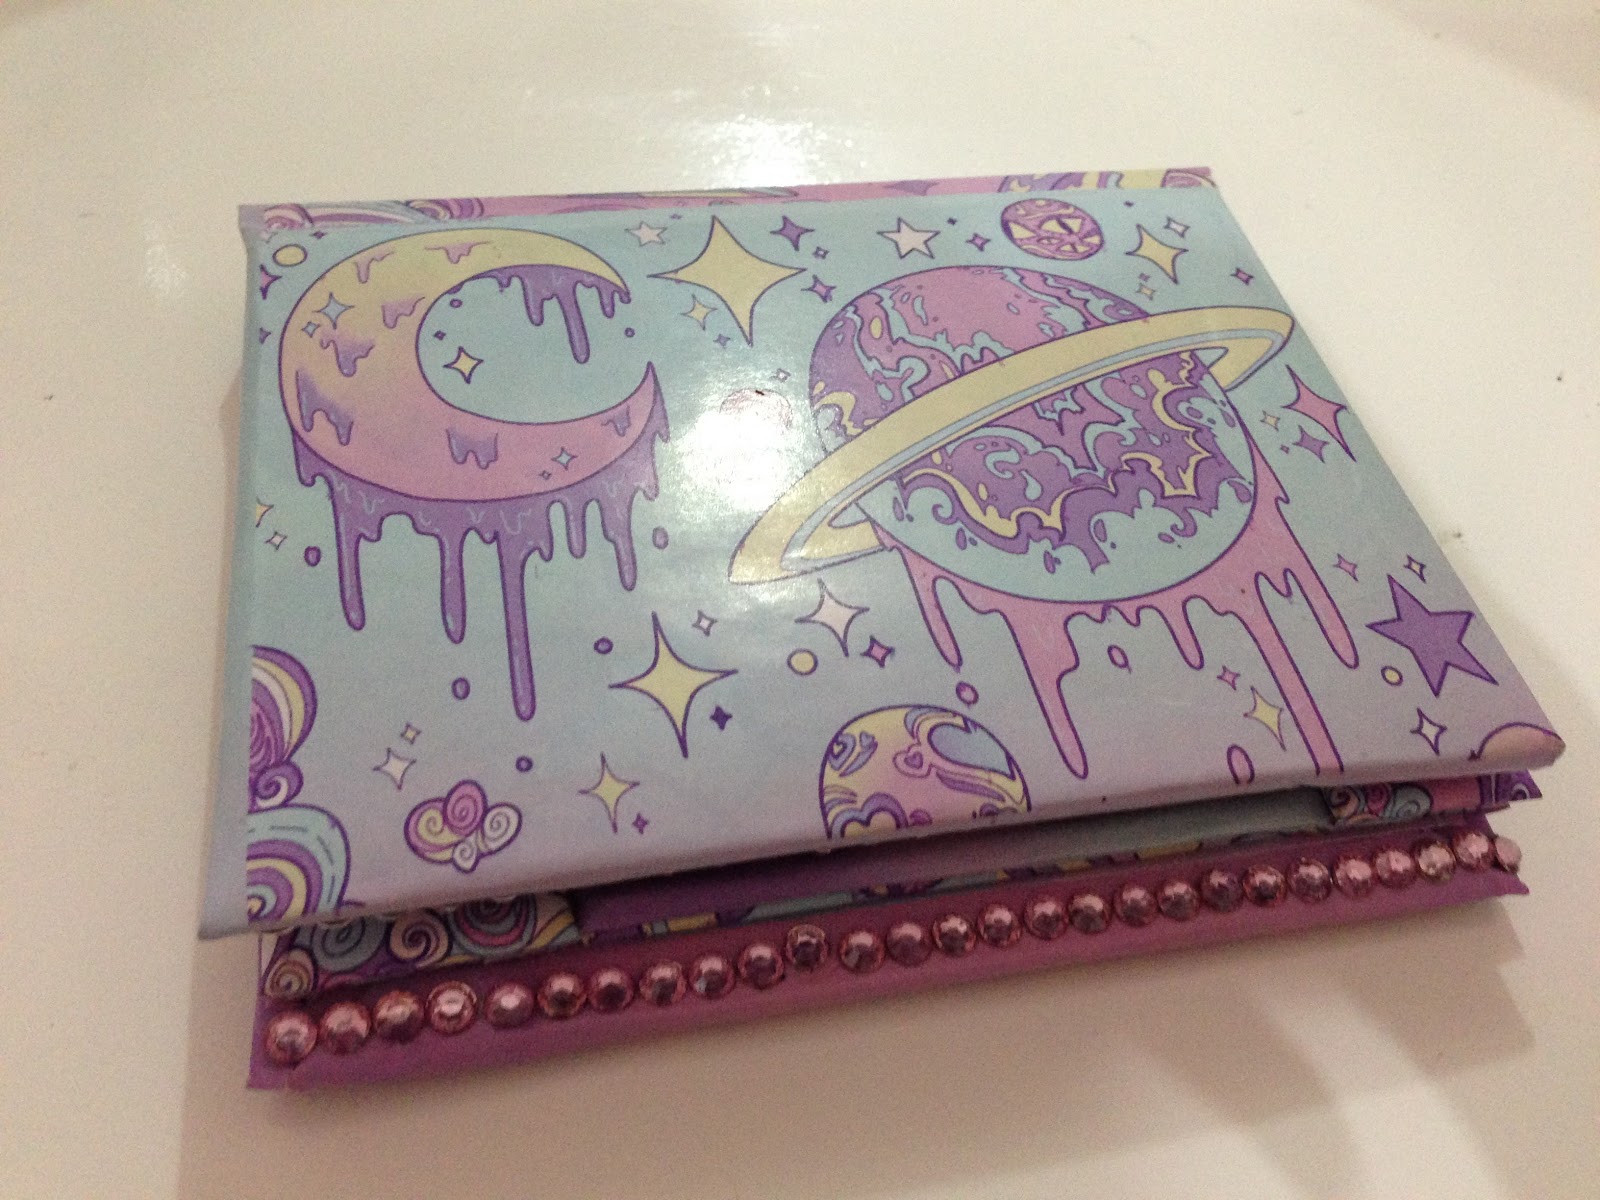
TADAAAAAAAAH~ o(≧∇≦o)
Watch this DIY Galaxy Makeup Palette live on my youtube channel!
I had so much fun doing this palette. It's just so pretty and I managed to make it neat. I've always dreamed of a pastel galaxy makeup palette. So I'd like to credit the artists of the prints on this palette. The awesome cover print was made by: GhostlyStatic. I so love ghostlystatic's gallery! And the cute girl inner print was made by: ShiroiRoom. Unfortunately, I can't find the site of the artist so I'm just linking where I got the print. ( ≧Д≦)
Honestly, I just randomly search cute graphics on Pinterest and print them out. I was a bit skeptic on doing so but this is just a experiment and I have no intention on selling them or what. I really do hope they won't mind if I used them for this project. ฅ(๑’Δ’๑)
So now let's move on to how I made them.
Step 1: This palette is made out of an old hardbound mini notebook of mine. I've seen some tutorials using DVD covers and watercolor palette. Honestly, I think they kinda look tacky. I wanted mine to be neat as possible and I want it to look "professionaly done" lol. So I thought a hardbound notebook would be cool to use for that. Well unfortunately, I don't have an image of the notebook that I used. But it's pretty close to this one:
Step 2: I arrange the placement of the eyeshadows. My eyeshadows are from the NYX Smokey Collection Palette. They used to be my favorite. I love the products on this palette but I haven't used them in a while because I'm always in a rush and the packaging is so bulky. It's not an ideal on the go palette for me. So I decided to depot them and make a compact and sleek home for them.
This is the original palette from NYX:
I also made a separate palette for the blush here it is:
It looks cute but it's quite a failure to me. Okay so going back to my tutorial...
Step 3: I made an outline of the arrangement of the eyeshadows.
Step 4: I cut the outline. This is to hold and keep the eyeshadows inside the palette.
Step 5: I printed out this cute art on a sticker paper.
Step 6: I cut an extra cardboard to elevate the eyeshadows and cover them with the printed sticker.
Step 7: Cover everything with the sticker paper.
(Optional)You can add small details like little pink stones.
Step 8: I used mighty bond on attaching the eyeshadows on the palette.
Suggestion: You can also put a mirror inside it. I wanted to put a mirror on it but I don't have a mirror that fits for this palette. So yea, i'll do that on my next project perhaps.
And here's the final result:
It's so cute!! I'm so happy with the outcome. (ノ≧∀≦)ノ It's quick and easy! I'll definitely make more and do a better version. Maybe I can add a magnetic snap so the palette would be more secured. Oh! and a mirror too. And this time, I'll definitely do my own artwork for the print. But for now, I'd like to credit the artists of the prints that I used for this experiment. Hehe~ So yeah I hope you guys like it. Stay tune for my next DIY makeup palette.
Hi everyone!! First things first, I know I'm 7 days late but....
HAPPY NEW YEAR EVERYONE! Better late than never! Hahaha.
(o´ω`o)ノ Welcome 2015!! ヾ(・ω・*)ノ
I attended Ozine Fest Anime Figure Special last December 28 of 2014 *yea super late post*(˘_˘٥) And I'm all dolled up! Oh how I missed dressing up on cosplay conventions. I used to spend 2 hours for my hair and makeup, and another hour for wearing my dress and fixing my wig/extensions. Haha that was my routine every time i'll attend conventions back then. I'd usually sport Lolita or Gyaru look during conventions back in the days. Attending convention is fun for me because it's the only time I can be fully kawaii on public haha! and the only time I can wear my favorite fancy dresses, without being judged that much by the people around me.Well It's a cosplay convention afterall. People in these kind of event are used to seeing kawaii ladies like me. lol just kiddin ✿乂◕‿◕乂Coz ya know Lolita isn't the type of fashion you could always pull off anytime, anywhere especially here in Philippines. Except if you don't give a damn on how people would look at you while you donned those platform heels on the streets.
It has been a very long time since the last time I dressed up for a con. So yeah it felt really nice to be able to do what I used to love. Finally I had the chance to get all dolled up again before my 2014 ended. Sailor Lolita is LOVE!
Top/Skirt/Headdress: Made by me | Necklace/ Angel wing ring:Kleyland| Shoes: J Baby Lolita
I'm super obsessed with the sailor look right now! That's why I decided to incorporate the sailor look to lolita style and made myself a Sailor Lolita outfit. I'm so loving the outcome especially the skirt. I'll do more of this style soon. 〷◠‿◠〷