Showing posts with label Makeup Tutorials. Show all posts

NYX FACE AWARDS TOP 30 CHALLENGE: ENCHANTED NYMPH

Hi, guys! I recently joined a makeup contest, NYX Face Awards, and I was lucky to be one of the top 30. The first challenge was Enchanted Nymph. So without further ado, I now present to you the makeup look that I did for this challenge.


Watch the video on my Youtube channel: 

Being part of the top 30 was a wonderful and an eye opening experience for me. Having to meet my fellow top 30 contenders was amazing.. I haven't met them personally, we just have this group on Facebook. We all share things a lot and I've learned a lot from them. I maybe the most quiet one on the group, but I've been secretly admiring all of them. They'are all so kind, humble, talented and awesome! I'm a little shy to approach everyone on the group because I look up to them and consider them as my idols. It was hard for me. But it was truly an honor to meet them all. Sometimes, I even feel like I don't deserve to be standing alongside with them because they're all so awesome! And I am just a beginner, and a boring one. But a part of me says, maybe I should just work hard to be able to reach their level. To prove that I am somewhat worthy to be part of this. I don't know. I am always doubting myself. 

That being said, I was such a fool for not giving my best shot on this challenge. I focused more on costume and props. What was I thinking? It's a freaking makeup competition, not a fashion designing competition! Majority of my time for preparation goes to costume making. And the consequence was, I wasn't able to come up with a good concept for the makeup. My piece was an impromptu makeup look. I just did the makeup on the spot. And I didn't liked the outcome of it. I really wanted to redo it. But I don't have enough time left. I have no choice but to use it as my piece for this challenge. I thought, maybe I should just give up and withdraw on this challenge. It was so bad, I was so unconfident to show it to the world. I felt so down and I hated myself for not doing my best. I cried in frustration to the point that I wanted to delete my piece and just hide in the dark.

But my friends, and supporters cheered me up and they did a great job on encouraging me to not give up. So I decided to continue and submit my piece. It was a though decision to make because I don't want them to see how I fail. However, I felt so guilty for those whose been looking forward on this. I am so sorry for those who supported me all along. I am so pessimist. But honestly, thank you so much for believing in me. I promise if I made it to the top 15, I will surely give it my best damn shot! This piece does not define my best as an artist. It was a fail for me. But you guys still thought that it was awesome. And I appreciate that so much. You guys are awesome! Thank you everyone for your support. Please know that I appreciate every single effort that you do just to support me. huhuhu (⌯˃̶᷄ ﹏ ˂̶᷄⌯)゚ Here's a virtual hug for you guys huhuhu ༼つ . •́ _ʖ •̀ . ༽つ༼つ . •́ _ʖ •̀ . ༽つ༼つ . •́ _ʖ •̀ . ༽つ༼つ . •́ _ʖ •̀ . ༽つ ♥(ˆ⌣ˆԅ)

I maybe not that good on expressing my gratitude. I've always been awkward on these kind of things. But guys, I really wanted to let you know that I am so grateful to have you guys by my side. You guys are a blessing to me. I hope you'd still continue to support me even if I don't make it to top 15. I will still do my best to be better even if I don't make it. I still want to inspire people with my art. I will strive to be better and worthy of having you guys as my supporters. I promise that..

So yea, enough of the drama. If you guys think that I deserved to be part of the top 15 then here's how you vote:

Step 1: Log into https://faceawards.nyxcosmetics.com.ph/
Step 2: Find Trisha Denise Montero's entry, then click on the Vote button.
Step 3: Click the Login with Facebook, then the Continue button.
Step 4. Click vote! (Maximum number of votes per day per account is 3)
Thank you!

Please vote for me everyday if you really want to help meeeeeee hehehehe


DIY Cute Galaxy Makeup Palette Out of a Mini Notebook ☆。゚+.(人-ω◕ฺ)゚+.゚

This project was made 2 months ago. But I'm only posting about it now because I'm too busy being a new mom. ( ◞・౪・)

Being a makeup junkie and a DIY enthusiast made me want to create my own customized makeup palette. I've always been wanting to do this for so long. And now finally here it is! I'll show you my first attempt on creating this DIY makeup palette. This is an inexpensive alternative for the infamous, Z Palette. Why spend $20 on a Z palette when you can be creative and make your own for only $5! Plus, it's more fun customizing your own palette. Just like what I did. (´ ◕◞౪◟-)-☆

I'll share some snaps and thoughts on how I did mine. It wasn't originally in my plan to do a tutorial for this. This is just like a trial and error, and an experiment to me. I'm still discovering ways on improving them. So I kinda missed taking pictures on some part of the procedure. But I'm planning to do a better palette with a very detailed tutorial soon! But for now, please bear with my not so detailed tutorial. So without further ado, I now present you my first attempt on DIY CUTE GALAXY MAKEUP PALETTE! 

TADAAAAAAAAH~ o(≧∇≦o)

Watch this DIY Galaxy Makeup Palette live on my youtube channel!


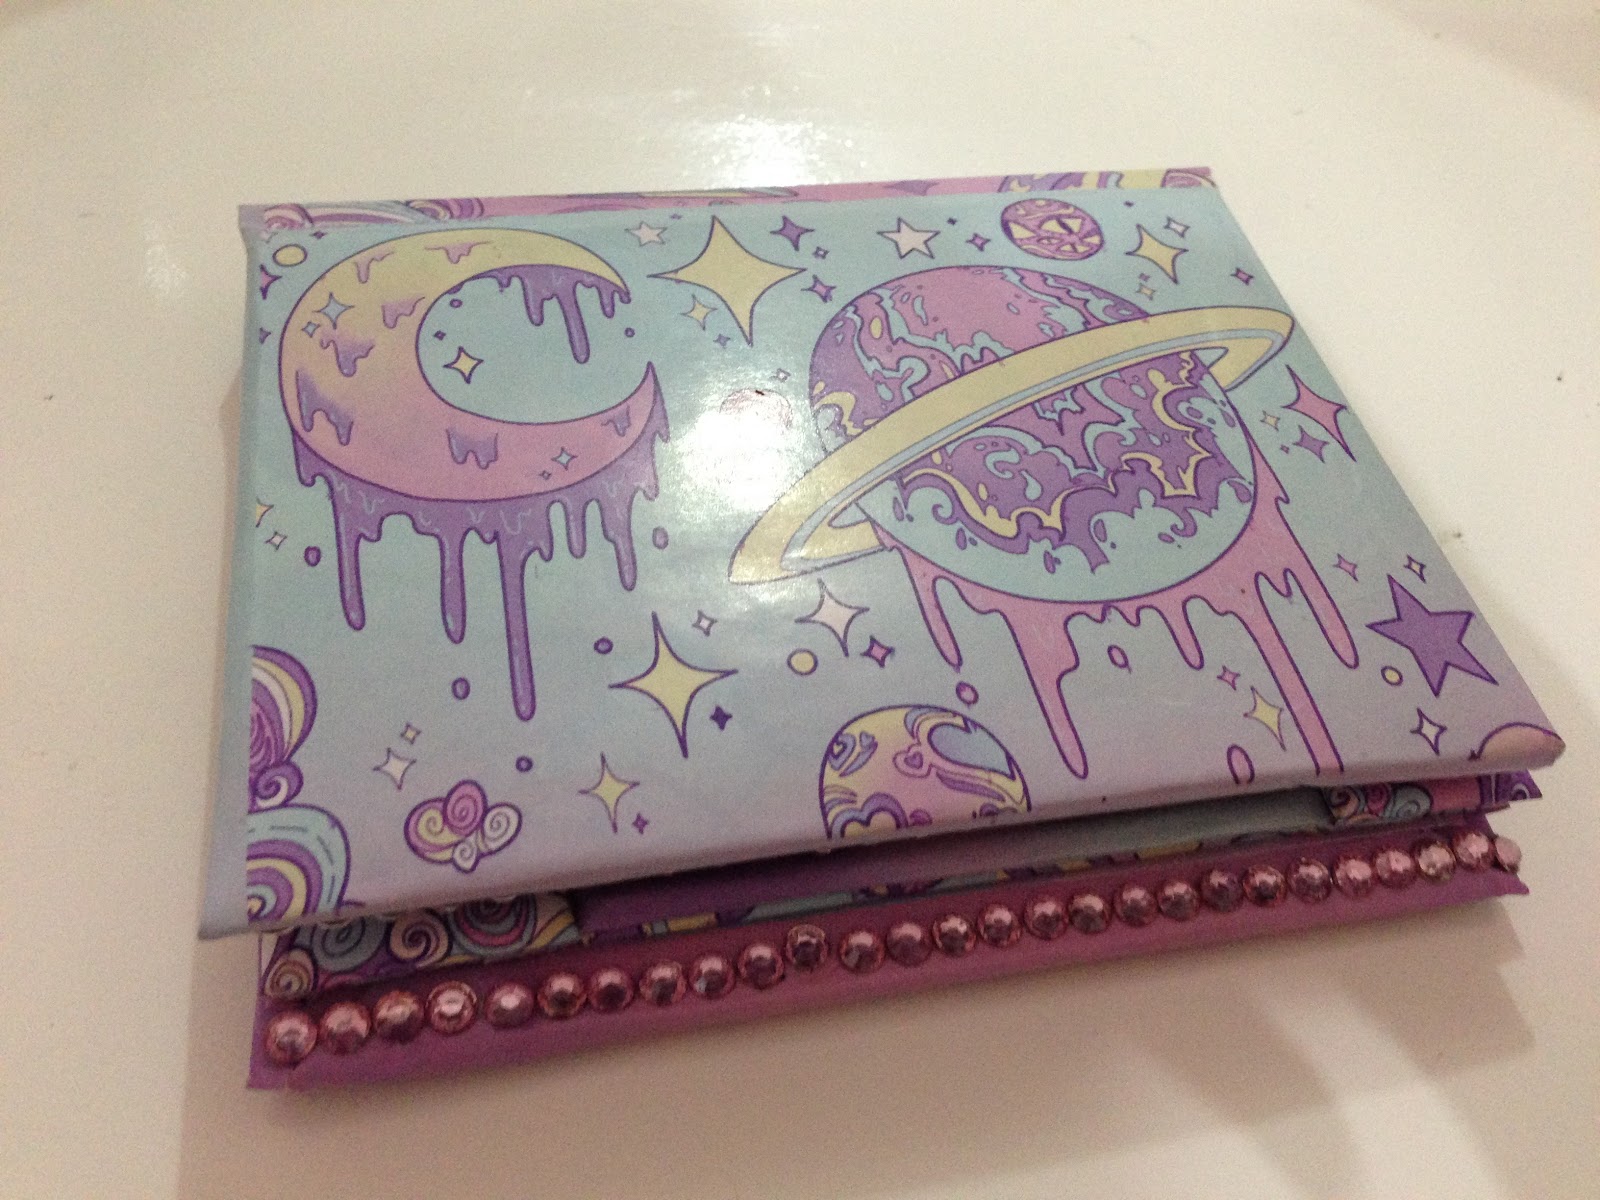
I had so much fun doing this palette. It's just so pretty and I managed to make it neat. I've always dreamed of a pastel galaxy makeup palette. So I'd like to credit the artists of the prints on this palette. The awesome cover print was made by: GhostlyStatic. I so love ghostlystatic's gallery! And the cute girl inner print was made by: ShiroiRoom. Unfortunately, I can't find the site of the artist so I'm just linking where I got the print. ( ≧Д≦)

Honestly, I just randomly search cute graphics on Pinterest and print them out. I was a bit skeptic on doing so but this is just a experiment and I have no intention on selling them or what. I really do hope they won't mind if I used them for this project. ฅ(๑’Δ’๑)

So now let's move on to how I made them.

Step 1: This palette is made out of an old hardbound mini notebook of mine. I've seen some tutorials using DVD covers and watercolor palette. Honestly, I think they kinda look tacky. I wanted mine to be neat as possible and I want it to look "professionaly done" lol. So I thought a hardbound notebook would be cool to use for that. Well unfortunately, I don't have an image of the notebook that I used. But it's pretty close to this one:

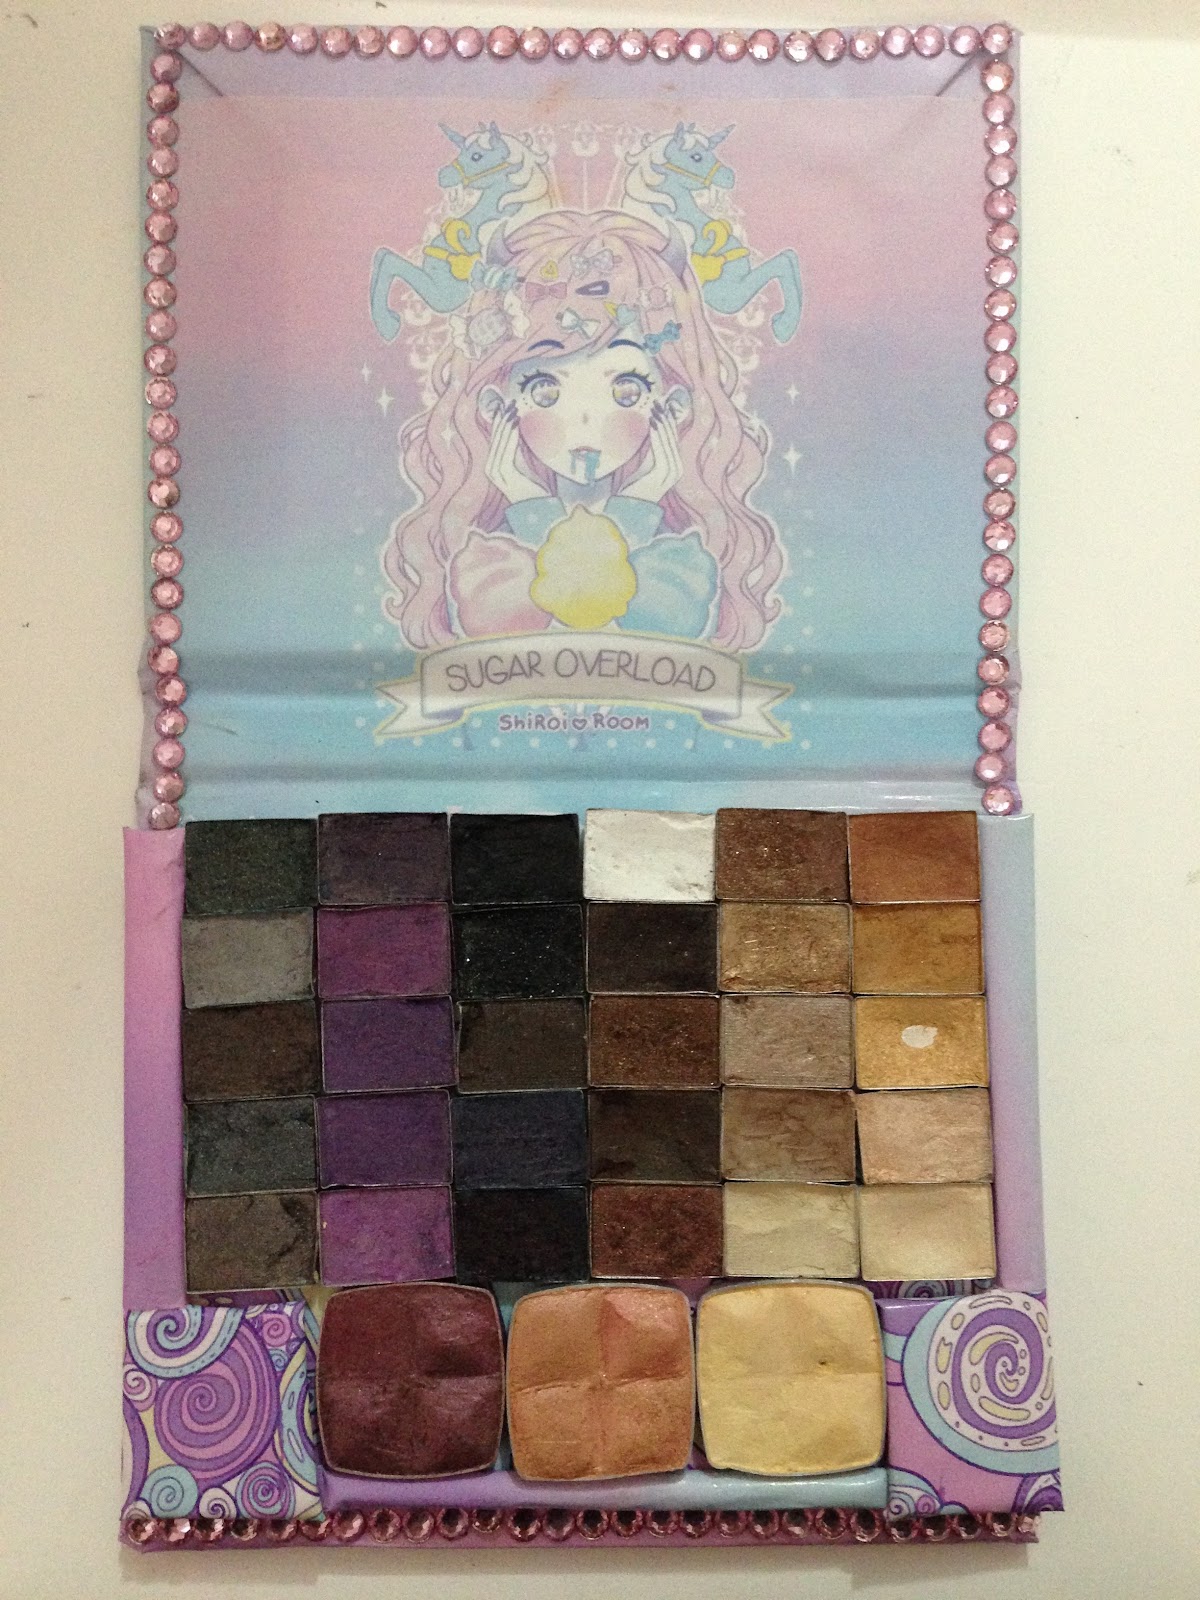
Step 2: I arrange the placement of the eyeshadows. My eyeshadows are from the NYX Smokey Collection Palette. They used to be my favorite. I love the products on this palette but I haven't used them in a while because I'm always in a rush and the packaging is so bulky. It's not an ideal on the go palette for me. So I decided to depot them and make a compact and sleek home for them. 

This is the original palette from NYX:

I also made a separate palette for the blush here it is:
It looks cute but it's quite a failure to me. Okay so going back to my tutorial...

Step 3: I made an outline of the arrangement of the eyeshadows.

Step 4: I cut the outline. This is to hold and keep the eyeshadows inside the palette. 

Step 5: I printed out this cute art on a sticker paper. 

Step 6: I cut an extra cardboard to elevate the eyeshadows and cover them with the printed sticker. 

Step 7: Cover everything with the sticker paper. 


(Optional)You can add small details like little pink stones.


Step 8: I used mighty bond on attaching the eyeshadows on the palette. 

Suggestion: You can also put a mirror inside it. I wanted to put a mirror on it but I don't have a mirror that fits for this palette. So yea, i'll do that on my next project perhaps. 

And here's the final result: 


It's so cute!! I'm so happy with the outcome. (ノ≧∀≦)ノ It's quick and easy! I'll definitely make more and do a better version. Maybe I can add a magnetic snap so the palette would be more secured. Oh! and a mirror too. And this time, I'll definitely do my own artwork for the print. But for now, I'd like to credit the artists of the prints that I used for this experiment. Hehe~ So yeah I hope you guys like it. Stay tune for my next DIY makeup palette. 

Tutorial: DIY Rainbow Highlight ♡✧( ु•⌄• )

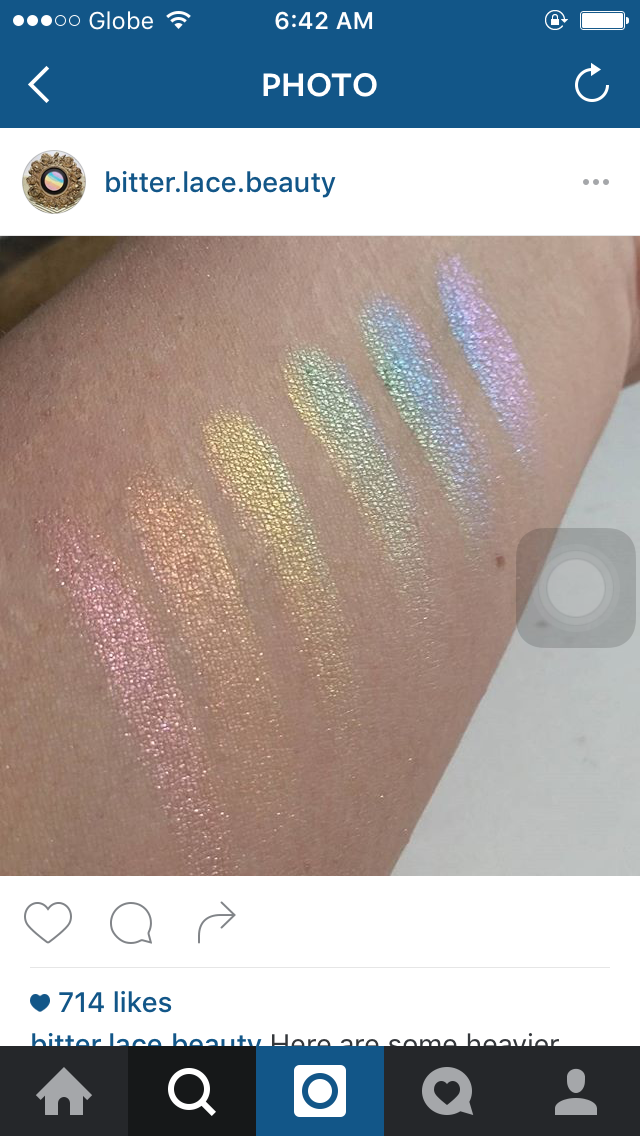
Rainbow highlighter fever has been making its rounds around the internet. It poses no wonder, I also fell in love at first sight! I really like the concept behind it, and I think it's very creative, something outside of the box and maybe even borderline magicla. I've never seen anything like it before! It's a concept by Bitterlace Beauty. They feature it on their Instagram page, and they also sell it on their Etsy shop.

I've been dying to get one from Bitterlace Beauty, but unfortunately, I'm having a hard time getting my hands on them because they're always sold out... so I thought there might be other ways around in getting one! I want them so bad! So, I decided to do some research (and by research, I mean a quick Google) and found my way to a tutorial on DIY Youtube video. I gave it a try and since experimenting was fun, and customizing is my cup of tea, I ended up doing four different highlighters! Hahaha~ (♡´౪`♡) *maniacal laugh fades into the distance*

They all look the same, don't they? But they're not! You'll know the differences soon enough. I had a blast, and I hope you will to. So without further ado, let's start the tutorial! o(≧∇≦o)

1. Reference picture of the rainbow highlighter. 
It's important to understand, observe and plan the set of colors you want to use. You should decide if you're going for a pastel set of colors, or you can go crazy with brights and neons, etc. 

These are the original Rainbow Highlighter known as "Prism" by Bitterlace Beauty. Aren't they beautiful!!? 


And these are different versions of the Rainbow highlighters by other Instagram sellers. 

From the reference pictures, you can see that the Prism highlighter is more vibrant than the others. From there, you can decide if you want the vibrant rainbow highlighter or the lighter one. The lighter one is obviously more wearable. But the Prism looks more magical to me.

2. Prepare the materials you need:
  •  Small plastic containers. 

The tutorials I saw in Youtube just used a paper container. But It's more convenient doing it on a plastic container as you'll be pouring alcohol in them later. You can also use a palette if you don't have small plastic containers.


  •  Empty makeup containers or a pan. 

NOTE: Please consider the size of the pan! The size should depend on the size of your cheeks. I recommend checking if the pan size is right for your cheek size. You wouldn't want your rainbow highlighter to be all over your face. It should be placed just on your cheeks. Plus, if it's too big then your brush won't pick up all the colors at the same time. 

  •  Pressed eyeshadows / makeup pigments that you won't miss. 
I recommend using a metallic, shimmer or baked eyeshadows so you won't need a highlighter. But you can also use matte eyeshadows. Just make sure you also have a highlighter so we can mix it together to add shimmer.

These are old makeups, I don't use them anymore. I don't mind breaking them to create the magical rainbow highlighter. 

NOTE: On the first versions of the DIY rainbow highlights that I made, I used different kinds of eyeshadow from different brands. And since I didn't want to spend money (honest!), I opted in to use what I already had. But the pigments were not even, and the texture was different. Trust me on this, this was also one of the reasons why I ended up doing four rainbow highlighters. I was annoyed with the difference in texture of each color on the same pan. So yeah, it was pretty much a hit and miss. So I'd recommend using an eyeshadow on the same palette like this one: 

I bought a cheap palette for this project. I was not contented with the first versions that I made. The consistency of each colors were different because they came from different brands. 
  • Rubbing Alcohol

  •  Spatula, toothpick, or anything similar to these:

  •  Round makeup lid/ square lid and paper tissue. This will be used to press the pigments later. 


3. Crush the eyeshadows using either a spatula or toothpick. Skip this step if you opted to use makeup pigments.

It should look like this after crushing the pigments:

4. Do a swatch test of the pigments
By doing so, you'll see if the set of colors that you made is right. 


You can also play with the colors. Customize the pigments by mixing it with other colors. You can use white to dilute the color of the pigments.

5. Pour a little amount of rubbing alcohol and mix it. 

It should look like this after mixing:

But if you ended up pouring a lot of alcohol like what happened to this:
Don't panic! It would eventually evaporate. You just gotta wait for a couple of minutes for it to have the pasty consistency that we want. 

6. Decide on the lineup of the colors.
One of the reasons why I advised you to have a reference picture with you is so you'll have better idea on which color would be better sitting beside the other colors.

7. Put them on the empty makeup container/ pan.

It should look like this after putting them all together:

8. Cover the pan with a paper tissue and press them using the round makeup lids.

It should look like this after you press it:
It looks a lot better now!

9. Wait for 24 hours for it to completely dry. And that's it you have now your own Magical Rainbow Highlighter! Enjoy~ .+:。(ノ・ω・)ノ゙

Here are the Rainbow Highlights that I made. I swatched some of them for you guys!


Me wearing the Rainbow Highlighter on the Gurlain container.


There you go~ I hope you guys enjoyed my tutorial~ ੭व(๑• .̫ •๑) ✧
Next post would be about this lavender kitty unicorn makeup look that I did recently :3 

Anyway, here's the link of the Youtube tutorial that I mentioned earlier: 


Related Posts Plugin for WordPress, Blogger...