
Rainbow highlighter fever has been making its rounds around the internet. It poses no wonder, I also fell in love at first sight! I really like the concept behind it, and I think it's very creative, something outside of the box and maybe even borderline magicla. I've never seen anything like it before! It's a concept by Bitterlace Beauty. They feature it on their Instagram page, and they also sell it on their Etsy shop.
I've been dying to get one from Bitterlace Beauty, but unfortunately, I'm having a hard time getting my hands on them because they're always sold out... so I thought there might be other ways around in getting one! I want them so bad! So, I decided to do some research (and by research, I mean a quick Google) and found my way to a tutorial on DIY Youtube video. I gave it a try and since experimenting was fun, and customizing is my cup of tea, I ended up doing four different highlighters! Hahaha~ (♡´౪`♡) *maniacal laugh fades into the distance*

They all look the same, don't they? But they're not! You'll know the differences soon enough. I had a blast, and I hope you will to. So without further ado, let's start the tutorial! o(≧∇≦o)
1. Reference picture of the rainbow highlighter.
It's important to understand, observe and plan the set of colors you want to use. You should decide if you're going for a pastel set of colors, or you can go crazy with brights and neons, etc.

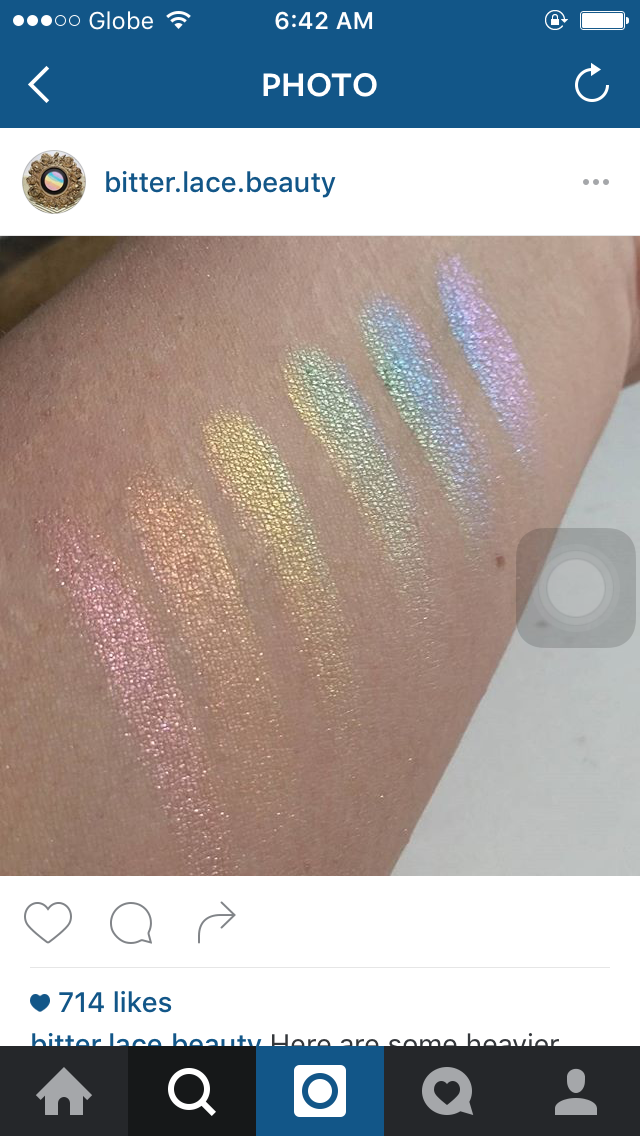


These are the original Rainbow Highlighter known as "Prism" by Bitterlace Beauty. Aren't they beautiful!!?


And these are different versions of the Rainbow highlighters by other Instagram sellers.
From the reference pictures, you can see that the Prism highlighter is more vibrant than the others. From there, you can decide if you want the vibrant rainbow highlighter or the lighter one. The lighter one is obviously more wearable. But the Prism looks more magical to me.
2. Prepare the materials you need:
- Small plastic containers.
The tutorials I saw in Youtube just used a paper container. But It's more convenient doing it on a plastic container as you'll be pouring alcohol in them later. You can also use a palette if you don't have small plastic containers.


- Empty makeup containers or a pan.
NOTE: Please consider the size of the pan! The size should depend on the size of your cheeks. I recommend checking if the pan size is right for your cheek size. You wouldn't want your rainbow highlighter to be all over your face. It should be placed just on your cheeks. Plus, if it's too big then your brush won't pick up all the colors at the same time.


- Pressed eyeshadows / makeup pigments that you won't miss.
I recommend using a metallic, shimmer or baked eyeshadows so you won't need a highlighter. But you can also use matte eyeshadows. Just make sure you also have a highlighter so we can mix it together to add shimmer.

These are old makeups, I don't use them anymore. I don't mind breaking them to create the magical rainbow highlighter.
NOTE: On the first versions of the DIY rainbow highlights that I made, I used different kinds of eyeshadow from different brands. And since I didn't want to spend money (honest!), I opted in to use what I already had. But the pigments were not even, and the texture was different. Trust me on this, this was also one of the reasons why I ended up doing four rainbow highlighters. I was annoyed with the difference in texture of each color on the same pan. So yeah, it was pretty much a hit and miss. So I'd recommend using an eyeshadow on the same palette like this one:


I bought a cheap palette for this project. I was not contented with the first versions that I made. The consistency of each colors were different because they came from different brands.
- Rubbing Alcohol

- Spatula, toothpick, or anything similar to these:

- Round makeup lid/ square lid and paper tissue. This will be used to press the pigments later.

3. Crush the eyeshadows using either a spatula or toothpick. Skip this step if you opted to use makeup pigments.

It should look like this after crushing the pigments:

4. Do a swatch test of the pigments
By doing so, you'll see if the set of colors that you made is right.


You can also play with the colors. Customize the pigments by mixing it with other colors. You can use white to dilute the color of the pigments.
5. Pour a little amount of rubbing alcohol and mix it.

It should look like this after mixing:

But if you ended up pouring a lot of alcohol like what happened to this:

Don't panic! It would eventually evaporate. You just gotta wait for a couple of minutes for it to have the pasty consistency that we want.
6. Decide on the lineup of the colors.
One of the reasons why I advised you to have a reference picture with you is so you'll have better idea on which color would be better sitting beside the other colors.


7. Put them on the empty makeup container/ pan.


It should look like this after putting them all together:


8. Cover the pan with a paper tissue and press them using the round makeup lids.


It should look like this after you press it:


It looks a lot better now!
9. Wait for 24 hours for it to completely dry. And that's it you have now your own Magical Rainbow Highlighter! Enjoy~ .+:。(ノ・ω・)ノ゙
Here are the Rainbow Highlights that I made. I swatched some of them for you guys!


Me wearing the Rainbow Highlighter on the Gurlain container.


There you go~ I hope you guys enjoyed my tutorial~ ੭व(๑• .̫ •๑) ✧
Next post would be about this lavender kitty unicorn makeup look that I did recently :3
Anyway, here's the link of the Youtube tutorial that I mentioned earlier:


No comments:
Post a Comment